Tender Dossier
Tender Dossier
Creating a tender, you will automatically have available a folder, that we call Tender Dossier, that will have all the information about the tender available such as: Messages, Proposals, Evaluations, Awards, Contracts, Amendments, between others.
How to access to the Tender Dossier?
To access to the tender dossier of each tender, on your “Dashboard” page, click on the reference of the tender. A new tab will open with the detailed information about that tender. You can open a maximum of 5 buyer dossiers at the same time.

How to Start?
After opening the tab of the selected tender dossier, it will be always visible through the tender the following details on top of the left side:
- The reference of the tender;
- Description of the tender;
- The Business Operation;
- Tender owner;
- Procedure Team (when applicable);
- Contracting Authorities; (This information is only visible when the user has the offer “Central Purchasing Bodies” and on the request he defines the field “Define Several Purchasing Bodies?” as “Yes”.)
If you wish, you can mark the “Follow up” of the Tender dossier and then find these tenders easily by using the filter available at the tender’s manager.

As you are starting the creation of your tender, you can change the tender owner of this
tender by clicking on the icon next to the description of your tender. It is possible to change the tender owner at any time during the tender process. However, the tender can only be assigned to a user that is part of the team of the tender or/and have access to the Business Operation assigned to the tender (if applicable).

On the top right side of the dossier it will be available a bell icon where the user will be able to define other user/Business Unit/User Group or hook of the team to receive the notifications regarding the tender.
This information can be changed by any user during the course of the tender.
Counter
To have a clear overview of the actions carried out in the tender, some counters will be displayed on the top of the tender dossier with the number of each action executed.
The counters will change once the state of the buyer dossier changes to “Dossier Awarded”.
The counters will show the numbers of the following information:
- Interested: Number of suppliers interested on the tender;
- Proposals: Number of proposals received for the tender (only available before the dossier is Awarded);
- Awarded Proposals: Number of proposals that have been awarded (only available after the dossier is awarded);
- New Messages: Number of new messages received;
- Pending tasks: Number of tasks that are on the state “Open”.
- Bids: Number of Bids received for the tender. (Counter available only for the eAuction procedure, when the eAuction finishes)

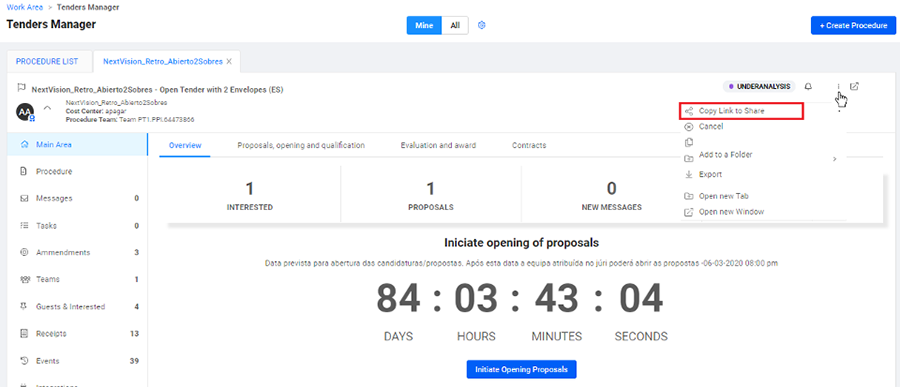
Share the Contract Notice of your tender
It is possible to share the “Contract Notice” of the tender. This option is available at the three dots icon, by clicking on the option “Copy Link to Share”.
NOTE: This option only appears when the request is public. On tenders with phases were the first request is public and the request of the next phases is private the option will only appear for the first one.
Export your tender
On the “three dots” icon, it is possible to export the tender by clicking on the “Export Procedure Documents” button. However, now it’s possible to select the folders that you want to download and also the name of the zip folder. After selecting the options, click on the button “Export”.
If you wish to export all folders, just click on “Export all” and all folders will be downloaded.

How to read the Timeline?
On the Buyer Tender Dossier, you will find a Timeline related to the tender. This Timeline includes the most important activities of a tender. It indicates future events, but it also includes past events.
The new Timeline has the propose to guide the user along the Tender process so that you can see the actions that you need to do along the way. The system will present the actions already done in green with the dates.
The timeline will be different according to the type of tender as the actions taken during the process.

Calendar
The small calendar on the left side, is connected with your timeline. On this calendar you will be able to see all dates related to this tender. You can click on each day and you will see the tasks/milestones of the tender that due on that day presented on small modal.
- The button “Create task” will open a drawer where you can create the manual tasks without leaving your work area.
- If you wish, you can click on “Download.ics”, and your task/milestone will be downloaded to your email account as an appointment.
Keep your tenders up to date
In the main area you will have available all the information updated about your tender. It will be possible to have visibility of what is happening what are next steps in your tender creation in a faster and intuitive way.
These actions will help you to fulfill some major steps on your process by clicking on the buttons available.
These guidelines are available for the following workflows:
1) Button “Continue Edition” if the tender is still in “Draft”

2) When the Buyer dossier/request needs to be approved, you will have available the button “Approve”, “Reject” and “See tender” according to if they are part of the workflow approval or not.
2.1. Button Approve: This button only appears to the user that has to approve the Buyer Dossier/Request. When clicking on the button the user will approve the action.

2.2. Button Reject: This button only appears to the user that has to approve the Buyer Dossier/Request. When clicking on the button the user will reject the action.
2.3. Button See Tender: This button appears to the users who are not part of the approval workflow. When clicking on the button the user will be redirected to the Buyer dossier/request Detail with the information all locked.
3) On tenders with invitation step, the button “Invite Suppliers” will be available at this main area (if the dossier is waiting for replies). An empty modal will appear were you can search for the supplier to invite from the directory.

4) You will be able to create a mini amendment through the button “Extended Dates” that will be available when the buyer didn’t receive any reply and the submission date has ended. When clicking on the “Extended Dates”, you will have to insert a justification to change dates and that information will be available in the amendment’s widget in the tender dossier. When making amendments through this option the workflow (if defined) will not be triggered.

5) The button “No Award” will be available until the tender is in analysis. When clicking on the button “No Award” the system will show a modal where the user must fulfill the reason for not awarding the tender.

6) The button “Initiate Opening” will appear after the deadline to open be achieved and for those who have access to the tender. When clicking on the button you will be redirected to the “Open Panel” and initiates the opening.

7) The button “Consult Opening” will appear to the users who have access to the tender but are not part of the opening workflow. When clicking on the button they will be redirected to the “Open Panel” widget

8) In the Auction procedure, “Access to eAuction” button will redirect you to the Auction page.
8.1. The user will have the following buttons available: “Create Proposal and Award”: Button that is available at the Auction detail nowadays.
8.2. “Create Reports”: Button that is available at the Auction detail nowadays.

Proposals tab
Once the Tender is Published the user will be able to see the tab “Proposals” after the “Overview”. On this tab the user will be able to view the replies received.
Here the user will be able to see the information regarding the opening of the replies on the section “Opening Phases” (each envelope corresponds to a line). This area will only be available on tenders with opening phases.
The replies Table has the following information available:
Before opening the replies
2. Company name - Locked when the proposal is not opened yet;
3. Delivery date and hour;
4. Value of the reply – Locked or unlocked according to the specifications of the tender. If it has opening or not.

After opening the replies
On the top of the page, the tab “Proposals” will have the information about the opening and qualification of the proposal available on new counters.
These new counters will show the number of Replies, number of Qualified replies (Shows the number of admitted and excluded replies), number of Admitted replies and number of Excluded replies.
Proposal’s View
The user can select the view by Proposal, Lots or State, depending on the procedure type and configuration.
The Proposal’s view is divided into the following columns:
1. Reference of the proposal;
2. Name of the company;
3. Delivery date and hour;
4. The Icon is only visible when the proposal has lots and informs on mouse over the number of lots replied and shows the value of the proposal;
5. State of the qualification with the correspondent color;
5.1. Green: Admitted; Red: Excluded; Blue: Partially admitted; Grey: Non-competitor; Yellow: Pending.
6. Icon that shows the number of non-conformities;
7. View link: Opens the proposal detail;
8. The three dots Icon: when clicking on the option the user will have available more action like for instance see the business card of the supplier.

NOTE: You will also be able to search by Proposal using the “Search tool” available on the top of the section.
On Proposal’s view, after opening the replies, you will have available the following buttons available below the counter (according to the tenders specific definitions they can be available or not):
- Open Panel: which will redirect the user to the open panel;
- Publish Bids List: which will redirect the user to the screen to publish the bids list;
- Publish Bidders List: which will redirect the user to the screen to publish the bidders list;
- View by Lots
In this view the user is able to see the proposals received by lot. It means that for each lot the user will be able to view the replies received for that specific lot. This view is only available if the tender has lots defined on the request. The lot’s view is divided in to the following columns:
1. Reference of the reply;
2. Supplier company Name;
3. Date when the proposal was delivered;
4. Shows the value of the proposal for the correspondent lot;
5. Shows the state of the qualification of the lot with the correspondent color;
5.1. Green: Admitted; Red: Excluded; Blue: Partially admitted; Grey: Non-competitor; Yellow: Pending.
6. View Link: Opens the proposal detail;
7. The three dots Icon: when clicking on the option the user will have available more action like for instance see the business card of the supplier.
NOTE: You will also be able to search by Lots name using the “Search tool”.

View by State
You will be able to see the replies organized according to their state: “Qualified”; “Disqualified” and “Waiting”, and also filter and order them by state.
This tab is always available after the tender is published.
- “Qualified”: When the proposal is qualified on the open panel;
- “Disqualified” - When the proposal is disqualified on the open panel;
- “Partially qualified”: When the proposal has lots and some of the lots are qualified and others are disqualified or waiting for a decision (only applied in some markets);
- “Waiting”: When there is no decision yet.

The state’s view is divided in to the following columns:
1. Reference of the reply;
2. Supplier company Name;
3. Date when the proposal was delivered;
4. Value of the reply;
5. Shows the number of non-compliances of the reply;
6. Link View: Opens the reply analysis;
7. The three dots Icon: hen clicking on the option the user will have available more action like for instance see the business card of the supplier.
NOTE: You will also be able to search by State using the “Search tool”.
View by Negotiation Round
It is possible to see the replies by Negotiation Round. The tab will only be available if on the request is defined that there will be negotiation and after the tender is published.
Each negotiation round will be available at the table separated by round so the user can easily identify each round.
The negotiation’s round view is divided into the following columns:
1) Reference of the reply;
2) Supplier company Name (locked or unlocked depending if the negotiation round was already opened or not);
3) Date when the proposal was delivered;
4) Value of the reply (locked or unlocked depending if the negotiation round was already opened or not);
5) Shows the number of non-compliances of the reply;
6) Link View: Opens the reply analysis;
7) The three dots Icon: when clicking on the option the user will have available more actions like for instance see the business card of the supplier.

How to Export the replies?
In all these different views, it’s possible to export the table of the replies received, by clicking on the button “Export”.
After clicking on the button, you can write the name of the file to be exported.
NOTE: This button is enabled once the replies are opened.
Tabs
All the tabs will be visible in a sequential way as you proceed in the procedure creation. The tabs available are the following: “Overview”; “Proposals” (Specified in point 3); “Negotiation”; “Negotiation and Auction”; “Evaluation and Award” and “Contracts”.
NOTE: The” Quick Tender” has some specifications, this tender will only have available the tabs “Overview” and “Proposals and Award”.
Negotiation and Auctions tab
Next to the tab “Proposals, Opening and Qualification”, there will be visible a new tab “Negotiation” (once the tender is published, and only if the tender has negotiation/auction defined on the request).
On this tab can be shown two tables: “Negotiation Rounds” and “eAuctions”. If the tender has only negotiation, it will only appear the table “Negotiation Rounds” and if it allows eAuction it will appear the “eAuction” table (both options are defined on the request and appear only if the tender has negotiation and/or auction defined as “Yes”).
In this tab is also possible to create new negotiation rounds and auctions by accessing to the button “Create new” available at the corresponding tables.
The “negotiation’s” table is divided in to the following columns:
1) Number of the round;
2) Reference of the round;
3) Creation date:
4) Publication date of the round;
5) User who has published the negotiation round;
6) State of the round, presented by colors.
7) View Link: Opens the detail of the round;
NOTE: On the search engine it is possible to search for any of the criteria’s presented on each table.

On the “negotiation and Auction’s” tab, the Auction table is divided in to the following columns:
1) Reference of the auction;
2) Creation date of the auction,
3) Beginning date of the auction;
4) End date of Auction;
5) Type/Version of the auction;
6) State of the auction, presented by colors;
7) Auction Link: Opens the auction page by clicking on it.
8) Detail Link: Opens the auction request by clicking on it.
9) On the three dots Icon are available the duplicate and delete options.

“Evaluation and Award” tab
This tab has the evaluation/Comparative maps and the awards tables. It is possible to create a new Evaluation / Comparative Map and Award on the corresponding table. To do so, click on the “Create New Evaluation / Comparative Map” or “Create New Award” buttons and they will open the evaluation/comparative map creation page or Award creation page.

“Contracts” tab
This tab is available after the user confirm the Award (State: finished) and the contract is created (State: In edition), in order for you to have a more direct way to access all the contracts created for each tender.
The “Contract’s” tab, is divided in to the following columns:
1. Code of the Contract;
2. Supplier Company Name;
3. Type of Contract;
4. Value of the Contract;
5. State of the Contract presented by colors;
6. “View” option will Open the Contract detail;
7. The three dots Icon, the option: “View supplier”, when clicking on the option it will open the supplier’s business card.

How to export the Contract?
In this tab it is possible to export the contract into a PDF, after clicking on “Ok” the contract will be available at the “Asynchronous downloads” manager.
Decrypting the proposals
To get the updated information about the decryption proposals, when decrypting them, it will be shown a graphic with the percentage of decrypted proposals. The percentage calculated applying the quotient between number of offers to decrypt and total number of offers.
NOTE: The graph will be available after the last user clicks on the button to “Open the Envelops”.

If the decryption fails, the user will have available a button “Repeat Opening” which will trigger the decryption again.

How to “No Award” a tender after publishing?
You can “No Award” the tender through the Tender Dossier“Overview”, by using the button “No award” or through the options available at the three dots Icon on each tender dossier.
After publishing the tender, if choosing the option “No award”, you will only be able to conclude the process after selecting the justification for the “No Award”.
This justification is configured by market, so depending on the market, the options to justify the non-award will be different.

How to manage the tools of your tender?
On the side bar menu, you have available several tools to help you to keep all the information updated. The specification of each toll is explained with more detail on the “Work tools” manual.
The tools available are listed below:
- Tender: Where the user has available all the general information about the tender after publishing;

- Messages: The “Messages” widget works as a communication system integrated in the platform. With this tool, it is possible to control and manage the exchanged messages with the suppliers regarding the correspondent tender.

- Tasks: In this widget, all the tasks associated with the tender are listed. It is possible to view the tasks detail, by clicking on the detail. On the task detail the user can reassign, edit and delete the task;

- Amendments: In this section, it will be listed all the amendments made in this tender. It is possible to view and create amendments in this specific procedure. After publishing the amendment, it is possible to view the log of changes in each amendment.

- Teams: In team’s section, you find the list of teams related to the opportunity according to the configuration of the entity. When the team is assigned to a procedure, it’s possible to select who is going to be responsible for its execution and change the team for a different one. The user can view the historic of the workflow, of the assigned team, and make the alterations needed.

- Invited & Interested: In this view, there will be listed all the suppliers invited and interested in the tender (when applicable), depending on the procedure type. It is possible to see the proposals, profile and messages of each supplier.

- Receipts: In this view it is possible to have access to all the receipts generated by the system for the tender.

- Events: All the modifications in the tender, are listed on the Events widget. For example: uploaded documents / files.

-
Integrations - The integrations will all be listed on the integrations section. The user can search for the state of the integration or the integration entity. In this section it is possible to see if the integration was published or not by the entity.
Integration widgets is only available for the procedures that require integration, this option can be define on the creation of the procedure.
